
📑 Table of Contents
1. Introduction
DetectLogPro is an advanced tool for Metal Detectorists giving you a place to record and manage your finds, and with the Premium upgrade, plan trips using historic maps and Lidar, and reports and labels. The premium edition also provides synchronisation with your Google Drive account to back up data and share with other devices you may have.
2. Maps
The Maps screen is the default and allows you see all your finds where you found them (centre of the thumbnail). Ribbon icons from left to right are:
- Cloud Sync (currently only Google Drive) – connect in the Settings screen if using for first time.
- Overlays visible. Overlays are only available when one of the 'URL' maps is selected, not the native Google maps. If you are not on one of these map types or don't have loaded Overlays (see Overlay section), then this icon won't appear.
- Route Tracking. This is not visible on desktop versions (see the mobile screenshot lower down), but when on will track you and stop automatically if you start travelling faster than a human is designed to go (so will stop when you drive home). When it stops, the route is saved and can only be seen by toggling 'show routes' in the menu.
- Filter. This option allows you to select what is loaded from your database. When data is filtered the icon changes to solid (in case you wonder where your finds have gone!)
- Menu. Allows you to select the map you prefer, manage route tracks, and access Settings.
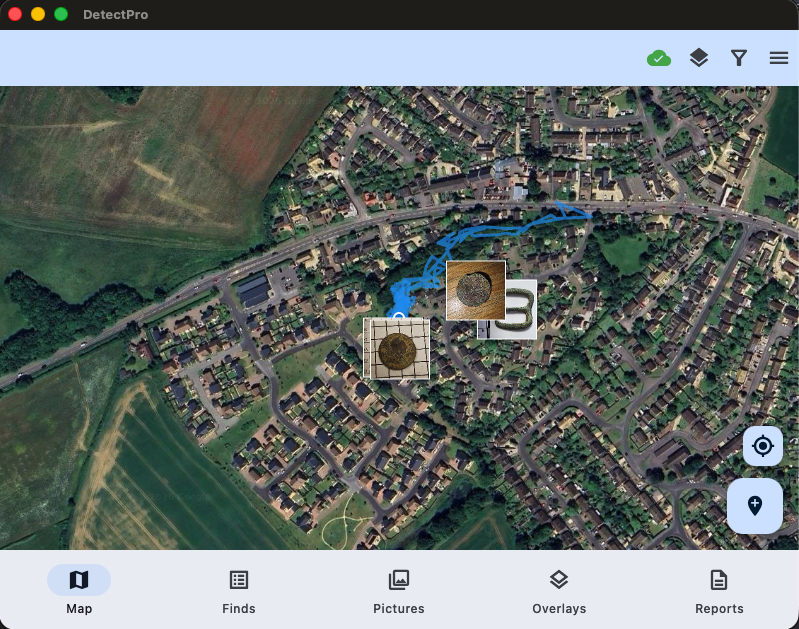
Figure 1: Desktop view of map screen
📌 Note
If route tracking is erratic on your phone, make sure that you have allowed the app to always run in the background (battery optimisation), and also in location services.
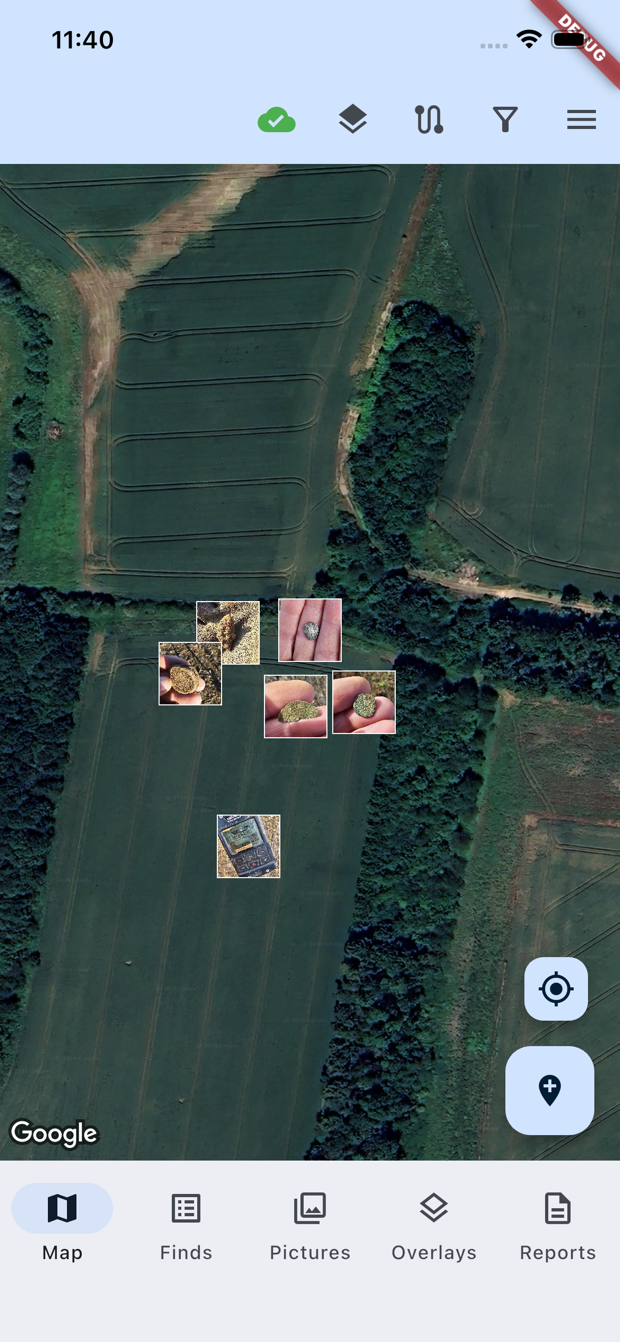
Figure 2: Mobile view of map screen
💡 Troubleshooting
If overlays or Lidar layers are not visible, ensure you're using a URL map, have loaded the MBTiles file, and try adjusting the zoom level (often zooming out will 'catch' the zoom level of the overlay and then it can use that to zoom in).
3. Adding Finds
Finds can be added in the field by pressing the waypoint icon, but also by selecting a point on the map and long pressing to get the add find prompt.
By default, the Add find form keeps things simple so you can quickly capture the name, target ID and a picture in the field. But you can expand out the form to capture more information if needed (or when back home).
Note if you add a PAS reference against your find, when viewing your find a button will automatically be enabled that will allow you to launch the page on finds.org.uk (If you are not in the UK but have a similar system you can edit the URL in the Settings screen to use your countries search). It is also possible to add a web URL – DetectLogPro will then use this instead of mapping to the PAS format.
If you have an iPhone and Apple Watch you can also add finds using the watch using dictation and avoiding the need to get your phone out with muddy gloves!
4. Custom 'URL' Maps
UK Historic OS maps from v5.0.0 are now pre-configured but not in the Settings screen it is possible to add your own custom maps using XYZ format URL's. In the UK, the best source is the National Library of Scotland MapTiler service (https://cloud.maptiler.com/tiles/) where you can sign up for free and copy the URL into the URL field on the settings form.
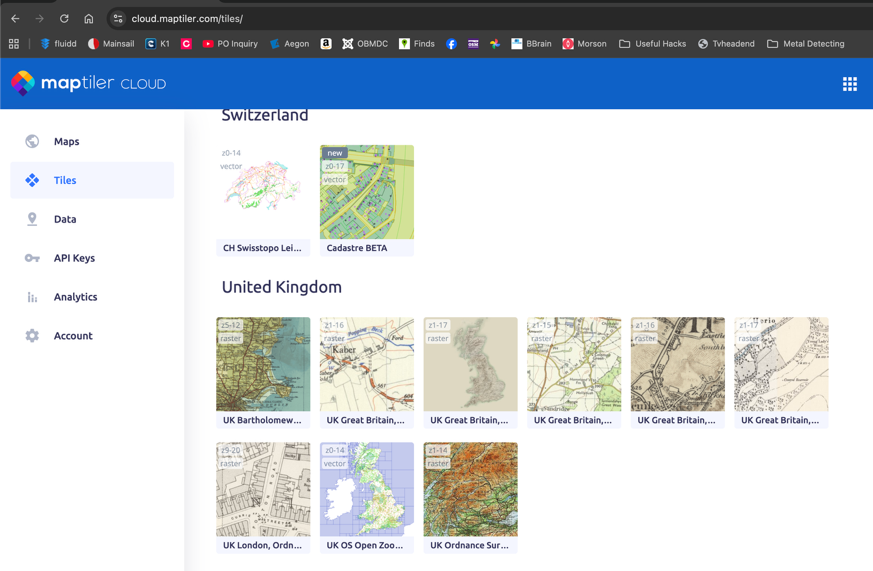
Figure 3: NLS MapTiler maps
You can add up to nine custom maps and toggle their availability on/off to make visible in the Map screen menu drop down (note depending on your phone the menu could grow to be bigger than the screen, but it will be scrollable).
For manual config or using other sources you will need to copy the 'Raster Tile XYZ' URL from MapTiler and then paste it into DetectLogPro as below:
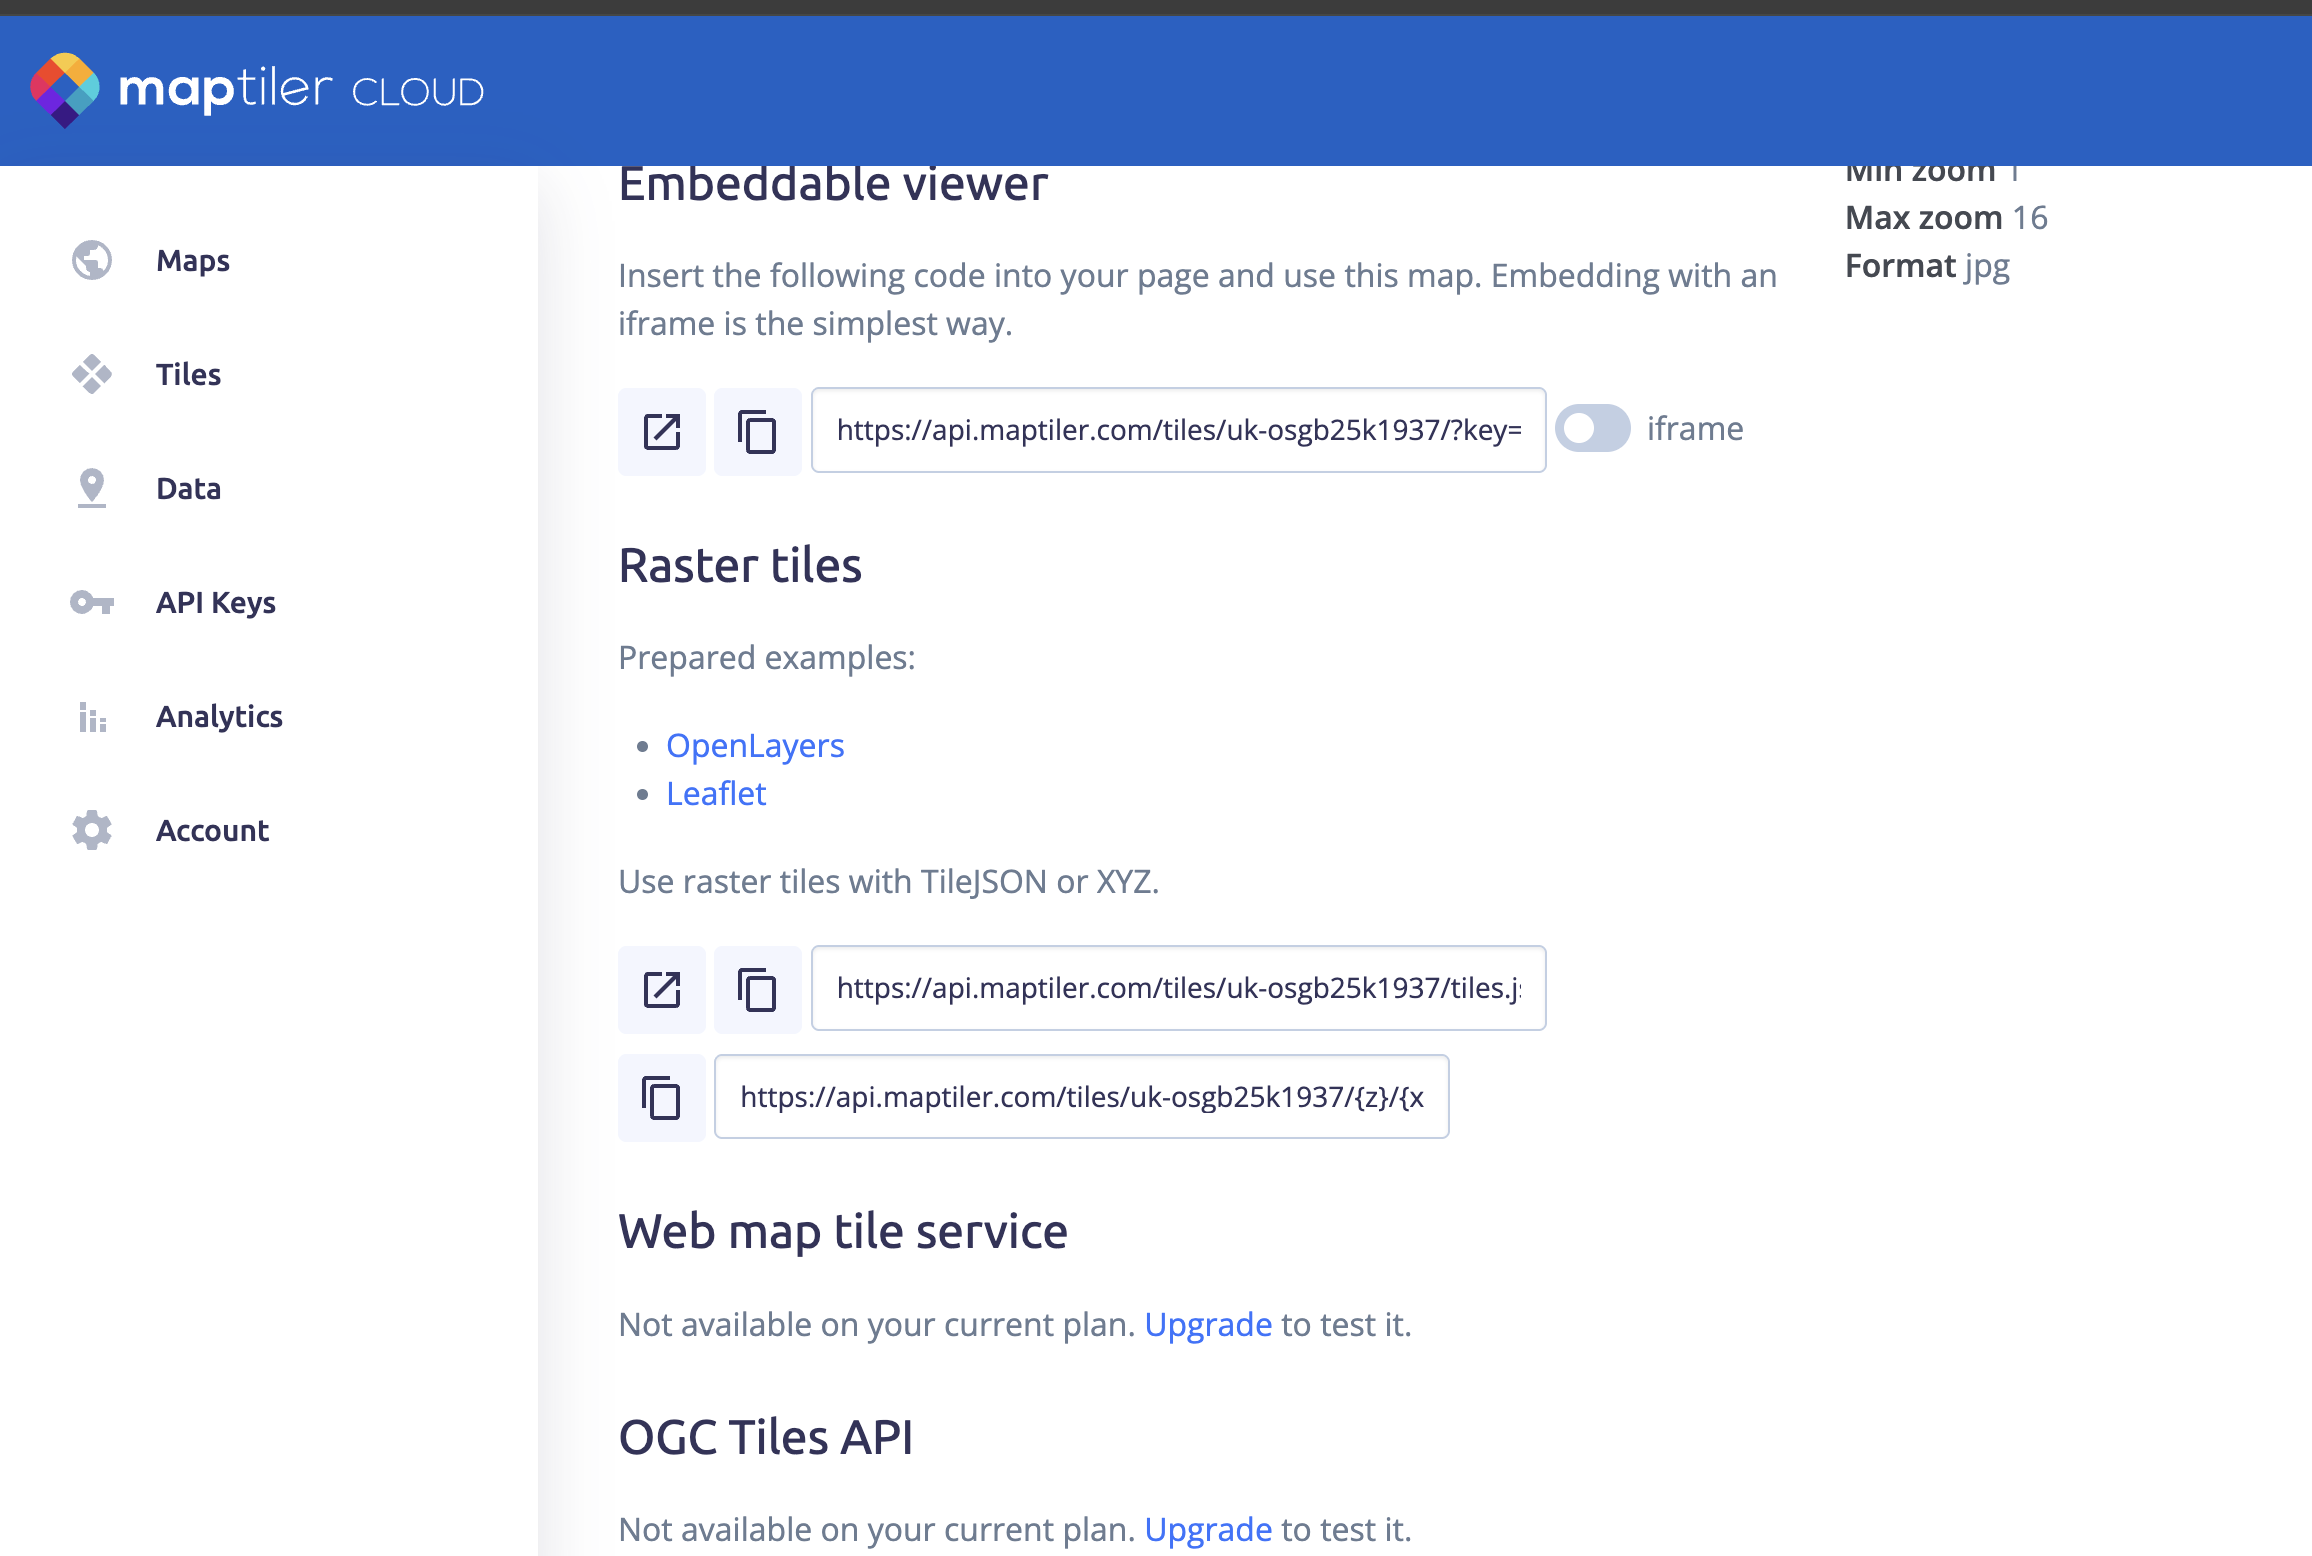
Figure 4: Raster tile URL (you need the 2nd one to paste into the settings screen)
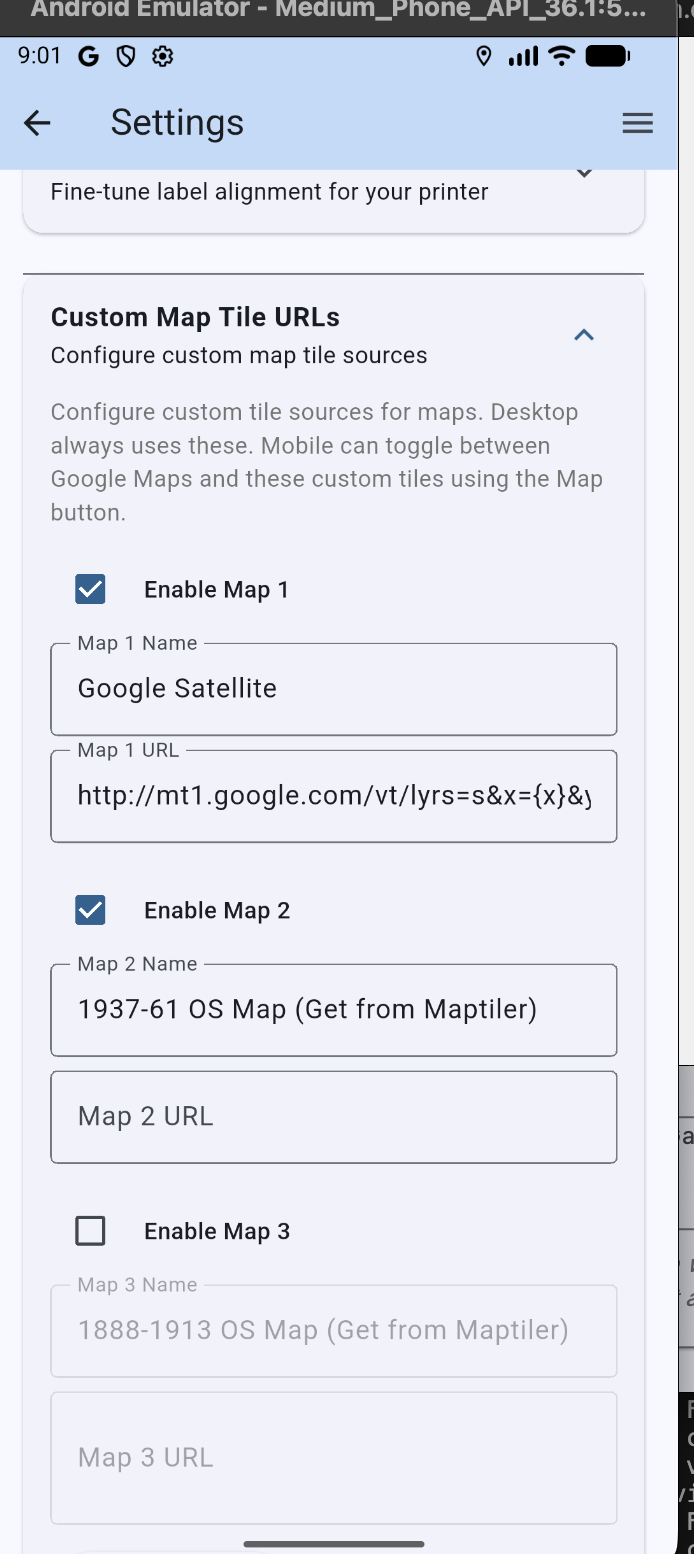
Figure 5: Configuring the 'URL' maps
📌 Note
When selecting a URL map, it may take a few seconds to reload your finds as the app is changing from a different map system. Also, you may have to zoom out to 'catch' the highest level of zoom for that tile set and then zoom back in (this also applies to Lidar Overlays). A good example of this is the 1937–61 OS map set that is provided with a lower zoom level than Google Satellite or the 1880's 6-inch OS map.
5. Finds Tab
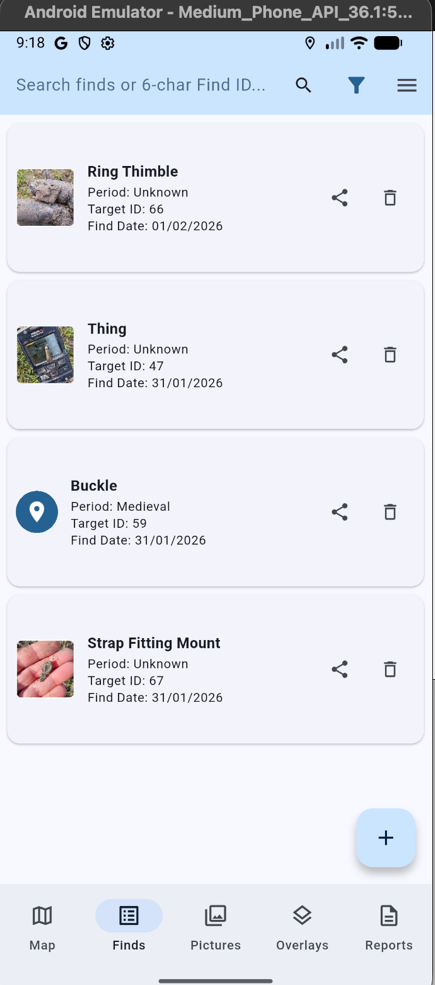
Figure 6: Finds Tab
The Finds tab is where you can search for Finds, share with friends and delete the duds (up until you sync this can be reversed by filtering on deleted finds in the map tab). It is possible to add new finds from this screen, but this can also be done from the map screen.
Long pressing on an entry will trigger selection mode where a number of finds can be selected and then used in Reports such as finds labels.
The search at the top of this form will search for text in each find but will also automatically recognise if you input a find ID.
6. Pictures Tab
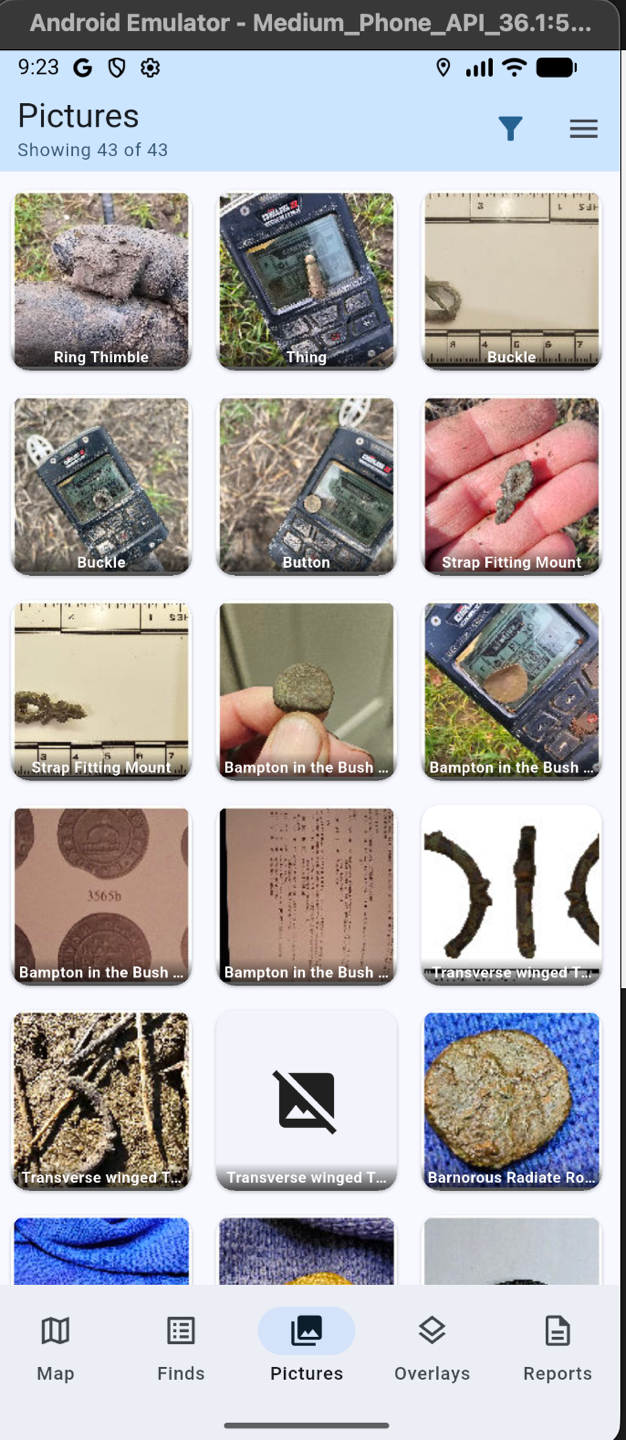
Figure 7: Pictures Tab
The Pictures tab shows all pictures and from where you can click to open the find record and see the full image.
To manage phone memory the app will only initially load a limited number of images, but scrolling down will automatically load more.
7. Overlays
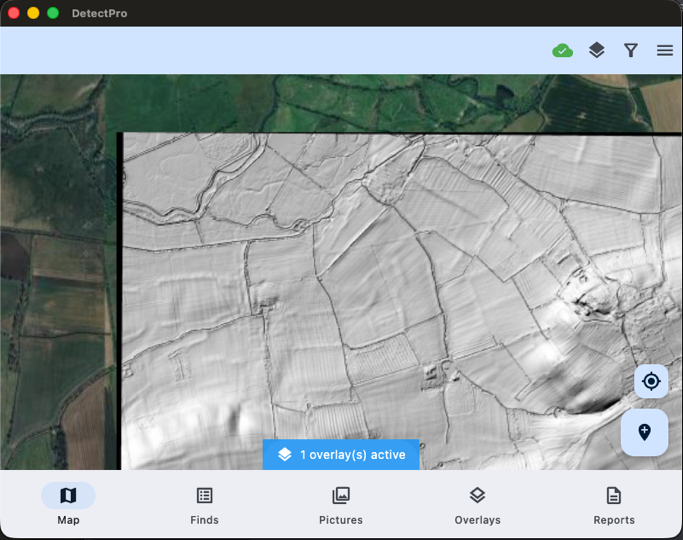
Figure 8: Lidar overlay on the Map screen
Version 3.0.0 of the app now introduces the ability to import LiDAR directly from the DEFRA site using server processing in the cloud. This is extremly simple and just involves pointing at a spot on a map where you need the Lidar tile. You are given the option to change settings of light direction and Z factor (elevation exaggeration). Default is for a punchy effect (Z=8) as this brings out features better for Detectorists. This is far superior to most LiDAR available online!
To restrict excessive use, a fair use limit of 25 conversions a month has been set. This hopefully should be more than enough for normal use.
It is also possible to use other methods to create MBTiles files. These can be exported from the excellent open source QGIS application. QGIS does allow you add extra views such as slope analysis and least cost path tracks.
You can also download from the PageTech website a simple tool that will convert TIF files downloaded from the UK DEFRA website (as seen above). For a detailed description of how to download and convert a Lidar tile from DEFRA see Appendix A – Generating MBTiles Files.
Waypoint and field map files in the form of GPX files or URL's that you can create on http://gridreferencefinder.com can also be loaded. These are useful for marking fields out, especially on a rally, or putting markers where hisotoric features have been discovered (you can find these out on the Heritage Gateway for your county).
💡 iPhone Tip
On iPhone the file explorer is a bit 'interesting' and you will need to press the '<' at the top left of the screen to move up from the app's storage folder to be able to see the rest of your device and cloud storage locations when trying to locate a downloaded MBTiles or GPX file.
8. Reports
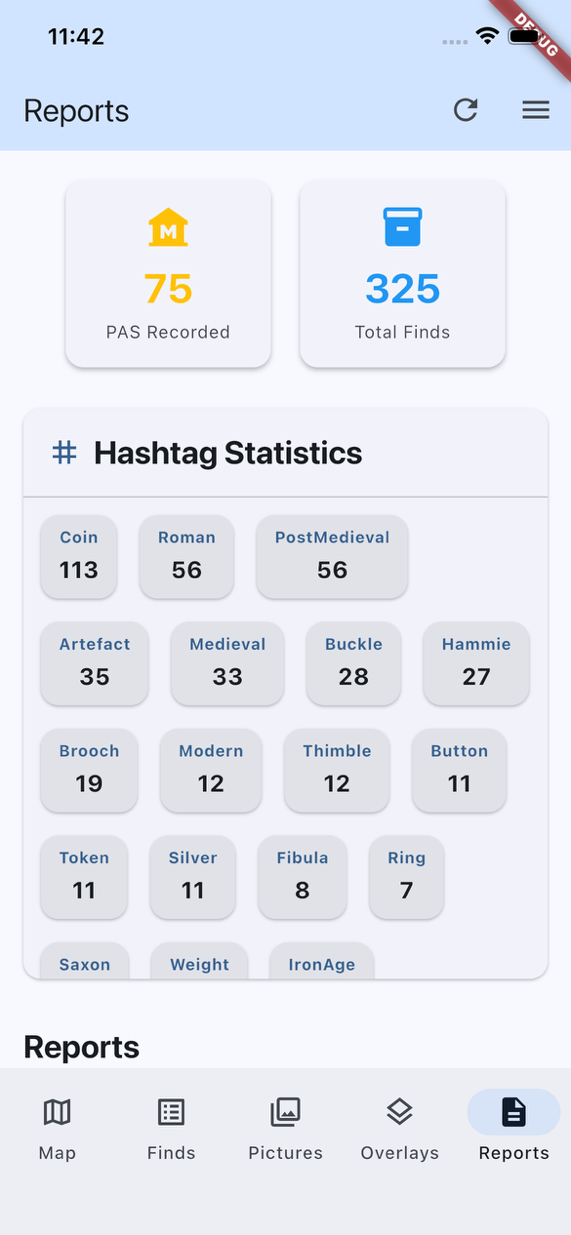
Figure 9: Reports screen
Reports tab is split into two sections. The top gives visual information on your finds while the lower half is dedicated to printed outputs
PAS count: is driven by the PAS field on the Finds form.
Value: Not surprisingly, this is driven by the Value field on the Finds form. Handy for telling your partner that your hobby isnt a total drain :-)
Hashtags: These totals are for the current filter (see map section), so can be used for instanceto report on the finds this year.
Coin Timelines: This will be in v4.0 expected by end of August 2026, and uses the Hashtags "EnglishCoin" or "ScottishCoin" along with the date you put in the Period field on your find. Dates can be ranges (so 1413-1422). The logic the app applies is to use this to map to a Monarch and if there is more than one choice look for the name you have given the find to try and pick the best choice. This though will allow you to easily see which Monarchs you have and which ones are on the bucket list.
Several standard reports can be printed (scroll down). Apart from the Storage & CSV reports you need to select finds first in the Finds tab (press and hold to start selection then tap as many as you need to print).
QR Code Label Printing
The QR Code labels are intended to print on 3 x 7 standard labels. The QR Code can be scanned by the mobile camera and will launch the app, finding the record in the database.
To print labels, you will need to print test prints (I recommend on paper rather than labels themselves) and adjust the settings to match your device (unfortunately I have found the mobile prints smaller labels compared with the Mac) and printer.
Label Printing configuration is in the Settings section:
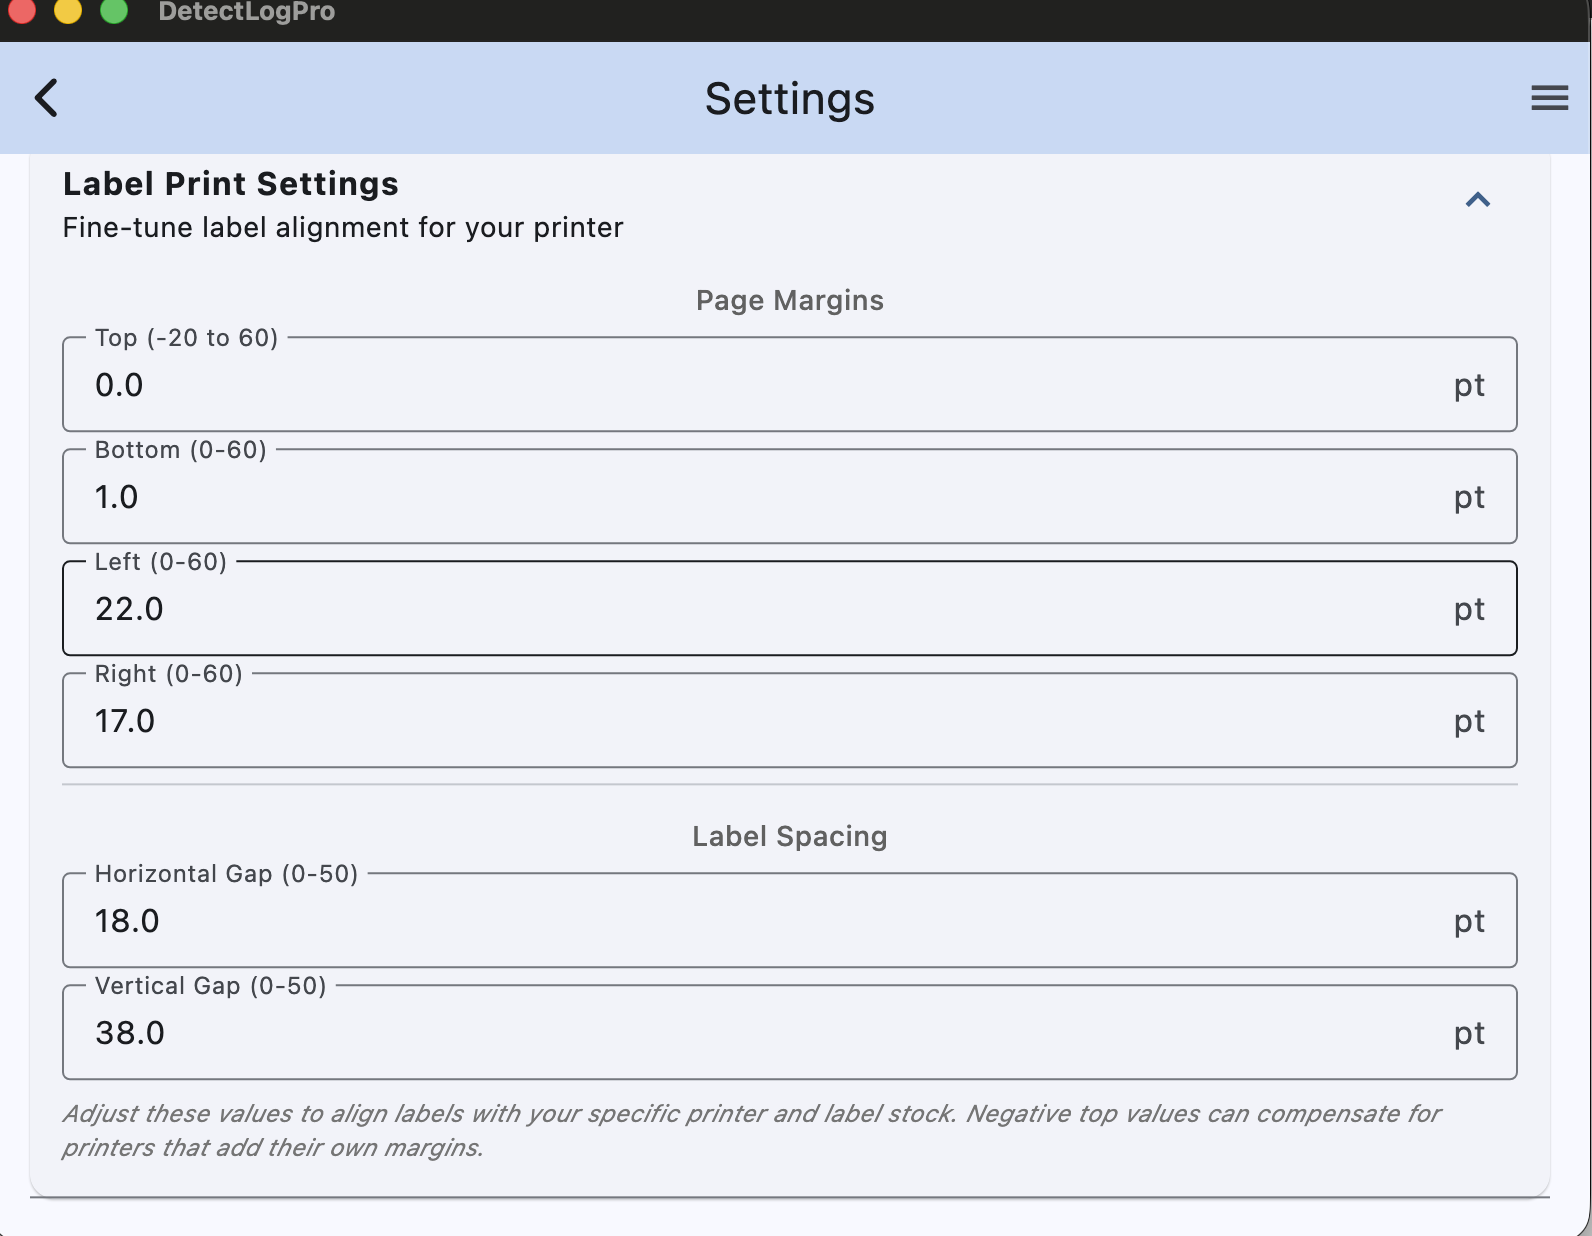
Figure 10: Label printing configuration
By comparison I had to set a Horizontal gap of 40 for the same report on a Samsung S23 Ultra.
To save label stock this report can start printing at the next space on your label sheet by specifying which label it should start printing at.
Brother P-touch Cube PT710BT Support (iOS only)
DetectLogPro has been tested to work with the Brother P-touch Cube PT710BT printer (currently iOS only). To connect, ensure your printer is powered on and in Bluetooth pairing mode. Then after having selected some finds on the Finds tab, and selecting the Brother P Cube option in Reports you will be prompted to select the printer (note this is NOT fast). This option also allows you select what gets printed on the label, but note due to the dimensions of these labels (you need the 24mm ones) it can only support 3 or 4 fields.
9. GPKG Import & Export
From the Settings screen it is possible to import your finds from other apps such as GoTerrain that support export to GPKG (these contain the finds record and photos). For desktop and Android this can be done via the section in the Settings screen. iOS devices you will need to use the Apple Files app to find your export and share with DetectLogPro. It is possible to select more than one GPKG file at a time. The app will not allow you to import the same file twice, so it is safe.
📌 iPhone Tip
On iPhone the file explorer requires you to press the back button after clicking 'Browse' to navigate to folders outside of the app's storage area. Once you know, you know!
From v5.0.0 it is also possible to export your finds with all data including routes and photos to a GPKG file, which can then be imported into another instance of DetectLogPro or other compatible apps such as QGIS.
10. Cloud Sync
First time you intend to Sync you need to connect to your Google Drive. It is possible for the DetectLogProSync Folder to be shared with others if you want to work as a team (their finds will show with a blue surround on the map screen if you each set a different username).
First time use you can either export all the local database with the cloud or import all from the cloud. In the latter case this will delete everything on your local database and replace with records from the cloud – so take care! Exporting all to the cloud will push a fresh record of everything in your database to the cloud folder, which in turn will trigger a refresh in other devices.
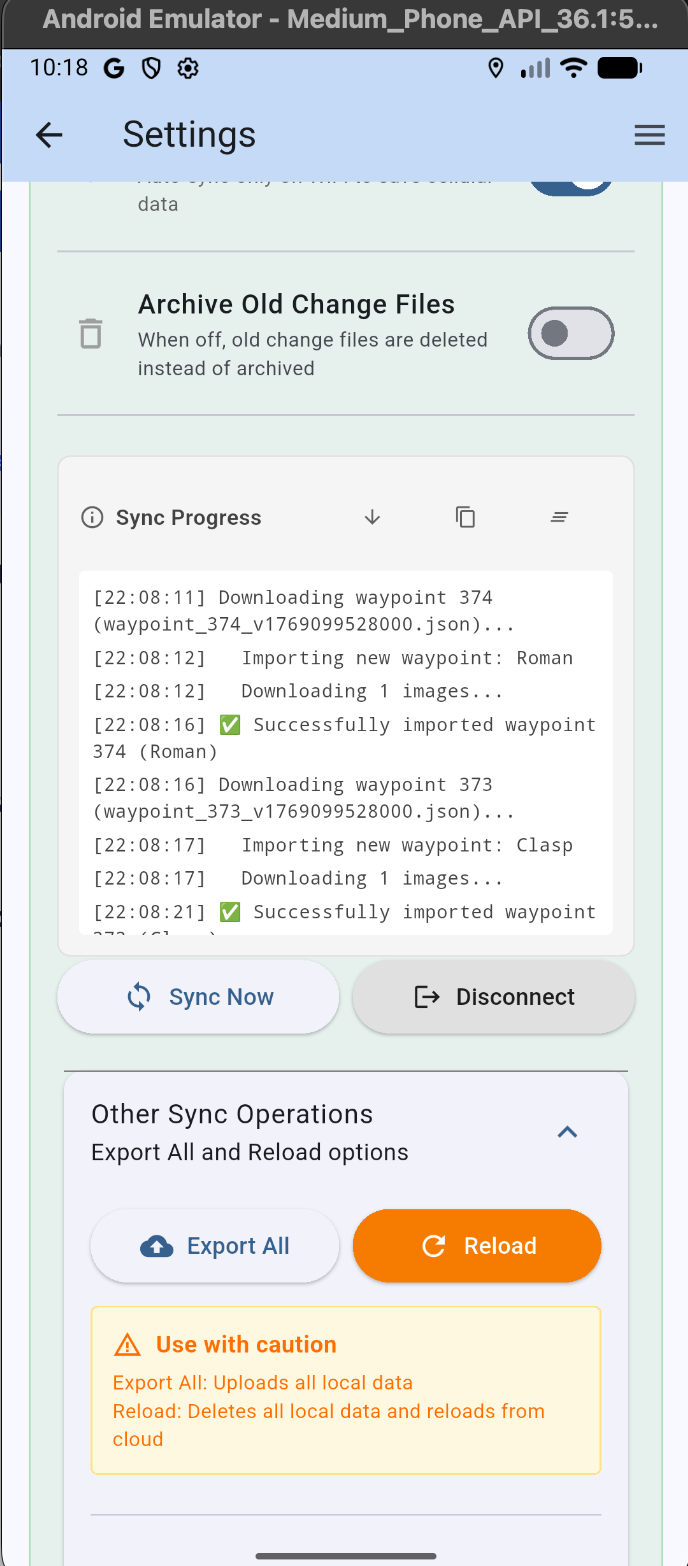
Figure 11: Cloud sync in Settings screen
⚠️ Important
Note syncing a big database for the first time can take a little while to complete and the app needs to be in the foreground and screen on while this completes (as iOS and Android suspend file transfer in the background). Recommendation is to temporarily turn off display timeout so this can complete. As a guide 340 records takes about 35 minutes. Fortunately sync updates after that are much quicker!
11. Apple Watch App
If you have an iPhone, you also have access to the DetectLogPro Watch app.
Once installed (via the Apple Watch App on your phone) it will give useful field functions:
- Add finds using your voice – dictate find descriptions without getting your phone out with muddy gloves!
- Map view – see a copy of the current map on your iPhone, including Lidar Overlays
- Watch 'Complication' – add a button ('Complication') to your watch screen to directly launch the app making it even easier to quickly record a find in the field
12. Appendix A – Generating MBTiles Files
To create an MBTiles file you first need to download a tile set from https://environment.data.gov.uk/survey and after zooming into the part of the country you need Lidar for, draw a polygon over the area you need.
Then after pressing 'Get available tiles', download your datasets. I use the LIDAR Composite DTM type and go for the highest resolution. This will download a zip file with amongst other things a TIF file (it will be the biggest thing in the zip file). This is the one you need to then convert to MBTiles.
As mentioned earlier QGIS is brilliant but complex.
Another option is to use the Hillshade Converter which we will shortly be making available — see Hillshade Converter for updates.
13. Frequently Asked Questions
💬 Need More Help?
If you have questions not covered in this manual, visit our Support page or contact us directly. We're here to help you get the most out of DetectLogPro!
Happy detecting! 🔍